


MIB2 PQ Retrofit: Rearview Camera Installation on a MKV Jetta
If you're upgrading your MKV Jetta with an MIB2 PQ retrofit, adding a rearview camera is a great way to modernize your setup. But how do you integrate it seamlessly?
One of our customers, Sam, tackled this challenge head-on while installing an EZT-supplied MIB2 stereo and rearview camera on his 2009 Jetta. Along the way, he encountered a few hurdles—mainly camera fitment and trunk release integration—but found creative solutions that made the install a success.
Here’s a breakdown of his key takeaways to help you get your setup working smoothly.
Camera Fitment & Mounting
One of the biggest obstacles was mounting the camera due to the unique design of the MKV Jetta’s license plate light assembly. Here’s how Sam made it work:
- Custom Spacers: Instead of forcing the camera into place, he used couplers and chopped bolts to create custom-length studs. This allowed the handle assembly to sit flush while keeping the camera securely mounted.


Sam also had to make a small modification for clearance. On the side profile photo, where he shows the trimmed bracket, the adjustment was necessary to make room for the license plate light studs and allow enough space to tighten the nuts properly.
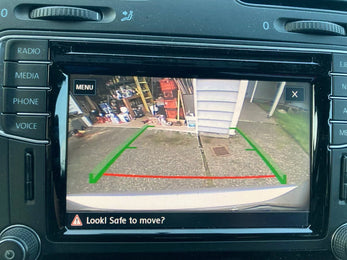
- Proper Positioning: Since the license plate light assembly acts as a natural spacer, fine-tuning the camera’s angle was crucial for optimal visibility. Taking the time to align it correctly ensures a clear rearview image.
Wiring & Integration
Wiring the camera correctly is key to ensuring smooth operation with the MIB2 system. Here’s how Sam handled it:
- Grounding: To simplify the install and avoid unnecessary wiring complexity, he grounded the camera to the same point as the existing system.
- Signal Wiring: He ran the power wire to the correct pin on the comfort module (behind the glovebox)—allowing the camera to function properly without any coding changes.
According to the Bentley manual, the correct tap-in point is pin 6 on connector T8a of the Comfort System Central Control Module (J393). This is documented in EWD 490 of the MKV Jetta service manual, but you likely won’t need the diagram—once you remove the plug from its housing, the pins are clearly labeled.


- Trunk Release Integration: Since the 2009 Jetta lacks a trunk lid release button, Sam had to manually wire the latch. By sourcing the correct plug at the dealership, he ran the second wire to the right pin on the comfort module, restoring full trunk release functionality.

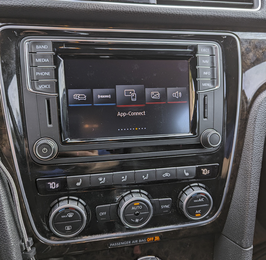
Final Adjustments & Results
Once the wiring was complete, everything worked seamlessly—no coding required! The camera operated just like it would on a later-model Sportwagen, making this a fantastic retrofit for MKV Jetta owners.
Thinking About This Install?
If you're planning to retrofit a rearview camera on your MKV Jetta, we hope Sam’s experience helps simplify the process. Have questions? Reach out to us at Eurozone Tuning—we’re happy to help!
Big thanks to Sam for sharing his experience and photos! Stay tuned for more customer retrofit guides and real-world installation insights.

Leave a comment